Get This Free Cheat Sheet Guaranteed To Help Your Next Mix

Thursday, March 17, 2011

Electric Guitar Miking 101

To many guitar players and engineers, there's only one way to mike an electric guitar amplifier and that's to shove a mic right against the grill cloth of the speaker cabinet. That works, but there's so much more to getting a great guitar sound than such a simple approach.

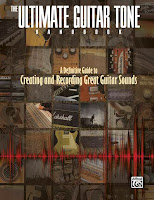
Here's an excerpt from The Ultimate Guitar Tone Handbook that I wrote with Rich Tozzoli that explains how to make that guitar sound bigger than you thought it could sound.
-----------------------------

A common recording process has an engineer EQing, compressing, and adding multiple mics in trying to capture a sound, yet never taking into account what the sound in the room at the source is like. That’s why it’s imperative that every engineer use the following steps in any serious microphone placement:
1. Go out into the room, stand in front of the amp or acoustic guitar player, and listen to them play the part from the song you’re about to record. Playing the song is important because you might be deceived if it’s another song or just random playing. Listen for the tonal balance from the amp or instrument as well as the way the room responds. Listening to the amp or acoustic guitar in the room will give you a reference point to the way it really sounds so you have a better idea of what you’re trying to capture. 
2. Find the sweet spot. There are several ways to find the sweet spot.
  • To place an omnidirectional mic, cover one ear and listen with the other. Move around the mic or player until you find the spot that sounds best. That’s where to place the mic to begin.
  • To place a cardioid mic, cup your hand behind your ear (instead of covering it) and move around the player or amp until you find the place that sounds best.
  • To place a stereo mic or stereo pair, cup both ears and move around the player or amp until you find the place that sounds best.
  • As an alternate method, crank the amp until it’s noisy, then put on headphones and listen to the mic as you move it around until the noise has the best combination of highs and lows.
3. You can’t place the mic by sight. The best mic position must always be found, not predicted. It’s okay to have a starting place, but it’s usually never what ends up being the best spot.
4. Change the mic position instead of reaching for the EQ. Chances are that you can adjust the quality of the sound enough by simply moving the mic in order to avoid using any equalization. The EQ will add a least a small amount of phase shift at some frequency and can’t be undone later. Moving the mic (which amounts to an acoustic EQ) will usually sound smoother and more pleasing to the ear.
5. Give the mic some distance. Remember, distance creates depth. The guitar and amp will sound a lot more natural than using artificial ambience. If possible, leave just enough distance between the mic and the source to get a bit of room reflection to it.
6. Be careful miking multi-speaker cabinets. 4x12 cabinets like the typical Marshall 1960 pose a special challenge in that at a certain distance you have phase anomalies from the multiple speakers that you really don’t want to capture. The cabinet will sound fine when close miked from right against the grill cloth to approximately three inches away from the best sounding speaker in the cabinet, but until you get to a distance of 18 inches where the sound of all the speakers converge, you may be capturing some speaker interaction that’s not all that pleasant sounding. That distance varies with the make and model of speaker cabinet.

----------------------------------

You should follow me on Twitter for daily news and updates on production and the music business.

Don't forget to check out my Music 3.0 blog for tips and tricks on navigating the music business.

Wednesday, March 16, 2011

Win A Copy Of The Studio Builder's Handbook

It's time for a new giveaway.

This time it's The Studio Builder's Handbook, a book about how to improve the sound of your home or commercial studio on virtually any budget.

You can enter the contest here.

"I Want The One I Can't Have"- The Smiths Song Analysis

Reader Chris Hernandez asked for a song analysis of The Smith's "I Want The One I Can't Have" from their 1985 Meat Is Murder album. This was the second album by the band and their only one to hit #1 in the UK (it made it to only 110 on the US charts). Let's take a look.

The Song - "I Want The One I Can't Have" has a strange form, as do many of The Smith's and Morrissey's songs. It's made up of just verses and choruses, but the choruses are twice as long as the verses, so there are actually two parts to it. It looks something like this.

Verse, Chorus, Verse, Chorus, Verse (solo), Chorus, 4 bar outro

The song does have a surprising melody that goes to unexpected places, always a plus in songwriting.

The Arrangement - There's not very much to the arrangement of this song, and virtually no production. The only thing that really changes is Johnny Marr's guitar, which goes to big whole note strums in the chorus, with different guitar fills throughout the song.

The arrangement elements look like this:

   * The Foundation - Bass and drums, which rarely waver from their parts

   * The Pad - There's no traditional pad, but the whole note guitar strums in the chorus almost qualify

   * The Rhythm - The rhythm guitar

   * The Lead - The Lead vocal

   * The Fills - The various guitar fills throughout the song

The Sound - In general, not that great. The overall sound is very small with not much low end. The vocals have a lot of so-so sounding reverb, and are pushed way out in front, thereby taking away virtually any punch from the band.

The Performance - Johnny Marr is the king of clean guitar sounds. It sounded like there were about 4 lead/fill parts each with slightly different sounds, which could have been intentional, but maybe not. The vocal is pretty mediocre in that there are a lot of badly out-of-tune notes throughout the song. Since Marr and Morrissey produced the album, it sounds like the effort of a studio neophyte who doesn't know how to get the best performances and isn't even aware when they're unacceptable.

OK, I've ragged on this song enough. The fact of the matter is that this album was a big hit for the band and it goes to show that if you have great songs, the production, sound and performances don't have to be great to touch people. Songs are always the secret ingredient.

As always, email me if you have any song analysis requests.


----------------------------------

You should follow me on Twitter for daily news and updates on production and the music business.

Don't forget to check out my Music 3.0 blog for tips and tricks on navigating the music business.
Tuesday, March 15, 2011

The In's And Outs Of Direct Boxes

I built my first direct box when I was a kid way back in the 70's. DI's (which stands for "direct injection") were a pretty new thing back then, and I was lucky enough to see an article in Recording Engineer/Producer magazine (boy, what a great mag that was!) that had a direct box schematic, so I built a couple. I heard somewhere that you could use a little cheap transformer from Radio Shack as the heart of the unit, so I used that. The boxes sounded pretty bad (the transformer was crap), but you couldn't buy one anywhere since they weren't commercially available, so my homebuilt ones were like gold.

Before you knew it, every band and solo singer/guitarist in a two state area wanted one and I was inundated with orders. At the time I was gigging almost every night, and these boxes were pretty labor intensive (mostly because of hand drilling the metal boxes), so after making about 20 units or so, I decided that I didn't want to be in the manufacturing business and killed what could have been a promising side business.

I bring this up because Radial Engineering built essentially that same box, but used the excellent Dean Jensen JT-DB-EPC transformer to make one of the best passive (it doesn't need power) DI's on the market today.

I can tell you from experience from using them and making my own that all DI's are not made equally. The passive boxes that are built around a transformer really depend on that transformer for the sound. Buy an inexpensive DI like a Behringer and it will work fine, but won't have the big bottom end that you need for a great bass guitar sound. Buy a Radial JDI or one from another brand that's built around that great Dean Jensen transformer, and you'll really hear what a bass should sound like.

If you can handle some tech talk, Radial's Peter Janus provides a great overview of the JDI and direct boxes in general.


----------------------------------

You should follow me on Twitter for daily news and updates on production and the music business.

Don't forget to check out my Music 3.0 blog for tips and tricks on navigating the music business.

Monday, March 14, 2011

Flying With Your Gear

It's never been easy to take your gear with you when you flew to a gig, but it's gotten harder today thanks to the stringent requirements of the TSA. That being said, there are some tricks that can make you life a lot easier, and they're here in an excerpt from The Touring Musician's Handbook. By the way, one of them is to lock your cases and luggage with an official TSA lock like shown on the left.

You can read more excerpts from The Touring Musician's Handbook, as well as my other books, on my website.
---------------------------------
Musicians have a lot of confusion about flying with gear and well they should. Security is tighter than ever and all of the baggage rules have changed, but it’s still possible to fly with musical instruments as either carry-on or checked baggage. Here are some flying tips to keep your gear safe and the TSA happy.
  • Many airlines will no longer allow a musical instrument in a gig bag to be a carry-on. This is actually a violation of the the agreement between the American Federation of Musicians and the TSA, which states that you can carry one musical instrument on with you providing it fits under the seat or in an overhead bin. Carry a copy of the American Federation of Musicians' correspondence with the TSA that you can download at this site; http://www.hornguys.com/TSALetter.pdf  Also, check out this article about carrying musical instruments on board at the TSA website (http://www.tsa.gov/travelers/airtravel/assistant/editorial_1235.shtm. Make sure that your tour manager is aware of your intention and that the airline is contacted beforehand.
  • All checked baggage must undergo at least one form of screening. Security screeners have the right to forcibly open locked baggage to complete the screening process, so leave your cases unlocked unless you want the locks broken. If a screener opens your checked baggage, they’ll place a notice telling you that they opened it, and will  then close it with a security seal. If you later find that something is missing, the TSA can be held responsible on a case by case basis, which is not much recourse if it’s something that you use every night. It’s always a good idea to be there when the screener opens up the case, if possible. There are now TSA approved locks available that can be easily opened by security screeners with a TSA master key, but appear as a traditional lock to everyone else [see the picture on the left].
TIP: If you can’t be there when a screen checks you baggage, include very clear and understandable written instructions for repacking and handling your instrument in a place where the screener will notice them.
  • If you’re able to carry an instrument on the plane, be careful that you don’t store any prohibited items like scissors or wire clippers in your bag or case. These will be confiscated so they definitely need to be checked. Remember that you can only carry on one musical instrument, one carry-on bag, and one personal item, if they allow a music instrument.
  • If you’re bringing extra batteries, keep them in their original packaging. They pose a very small risk of fire (very, very small) so the TSA prefers that their terminals not be able to touch anything and keeping them in the original packaging is the safest way.
  • Since August of 2006, you can bring limited quantities of liquids, aerosols and gels in your carry-on bag, but you have to observe what they call the 3-1-1 rule. That is, a 3.4 ounce (1000 ml) or less bottle of liquid put into a 1 quart clear plastic bag, and only 1 bag per person put separately into the screening bin. If you have any doubts, put them in checked luggage.
For more about airport security, get it right from the source at tsatraveltips.us.
----------------------------------

You should follow me on Twitter for daily news and updates on production and the music business.

Don't forget to check out my Music 3.0 blog for tips and tricks on navigating the music business.

Sunday, March 13, 2011

"Rolling In The Deep" - Adele Song Analysis

Here's an analysis of Adele's "Rolling In The Deep," a song which topped the charts not only in the US, but in countries around the world. The song is from her top selling album 21. As always, we'll look at the basic elements of the song; the song itself, the arrangement, the sound and performance.

The Song - "Rolling In The Deep" is pop music at it's most basic in that it uses a bare bones form used by countless hit records. The form is:

Verse, B Section, Chorus | Verse, B Section, Chorus | Bridge, Verse, Chorus, Chorus, Chorus

This means the form is:
A, B, C, A, B, C, D, A, C, C, C

What makes this song bare bones is that there are no song intros, interludes or outros. In fact, the song ends pretty abruptly.

The Arrangement - Once again, this is about as formulaic as you can get. That being said, take special note because it works!! It's a clinic on how to arrange a song without anything extra getting in the way.

The song begins with just the eighth note guitar and lead vocal, which is joined by the kick drum in the 2nd half of the verse. In the B section, simple piano triads, the bass, and rest of the drums enter. See the development?

In the chorus, an strumming acoustic guitar and piano eighth notes push the song along as well as the entrance from the background vocal answers.

In the second verse, the low piano octaves on the 'one and', then the background vocals enter in the 2nd  B section. See how the 2nd verse develops? In the second chorus the background vocals add a harmony to make that section different from the first.

The last verse and first out chorus breaks down to kick and fills (which seems to be happening in all the hits these days).

The arrangement elements look like this:

   * The Foundation - bass and drums

   * The Pad - there's not really a true pad, but in the B section, the piano playing whole note chords does it for a bit.

   * The Rhythm - the eighth note guitar in the verse, the strummed acoustic and eighth piano in the chorus

   * The Lead - the lead vocal

   * The Fills - the background vocals and occasional clean lead guitar

The Sound - Nothing special here. Like all Rick Rubin productions, this is not that far away from the sound of a demo. The vocal has a pretty good sound with a nicely shaped long reverb, but the eighth note guitar is so dry that it really does sound like it's played in someone's garage. The drums have a big natural ambience that works, but isn't particularly great sounding. The lead vocal is a little on the squashed side, and has a click at 21 seconds that I'm not sure is on the master or just this video.

The Performance - Nothing special here except for Adele's vocal, which is great, as it should be. All the parts of the song a very simple, but they're performed well.

Feel free to send you your suggestions for future song analysis.


----------------------------------

You should follow me on Twitter for daily news and updates on production and the music business.

Don't forget to check out my Music 3.0 blog for tips and tricks on navigating the music business.

LinkWithin

Related Posts Plugin for WordPress, Blogger...