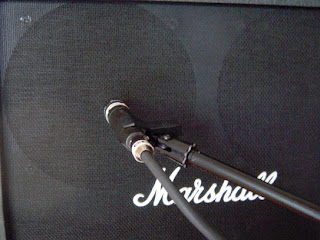
While many believe there’s only one accepted way to mic an amplifier, you’ll be surprised to learn that there are as many ways as there are guitar and amp sounds. Let’s look at some.
Using A Single Mic
It’s amazing what you can do with a single mic if you experiment a bit. Here are a number of techniques that have been used on popular recordings since the 50’s. They all work, but remember that what works for one recording may not work for another. That’s why it’s good to always have an alternative in your pocket when you need one.
 |
| The Classic Setup - An SM57 On The Best Speaker |
The Classic Setup
Place a Shure SM57 about one inch away from the best sounding speaker in the cabinet. Place the mic about three quarters of the way between the edge of the speaker and the voice coil (away from the voice coil). If you need more high end, move the mic towards the voice coil (the center of the speaker). If the sound needs more body, move it towards the outside edge of the speaker. Make sure that the mic does not touch the speaker cone when the loudest passages are played.
 |
| Old School Setup: Distance Miking Where Speakers Converge |
The Old School Setup
The way amplifier miking was consistently done in the 60’s and 70’s was to place the mic from one to two feet away from the center of the speaker or speakers. This allows the sound from the speakers and the cabinet to develop, but also captures some of the room, which can be a nice bonus. The ideal distance on a cabinet with two speakers is where the output of both speakers combine. Move the mic to the side to capture more of the sound of one of the speakers voice coils if more high end is required.
 |
| Miking A Marshall Cabinet With One Mic |
Miking A Marshall 4x12
If you’re using a Marshall 4x12 cabinet, position a single mic 12 to 24 inches from the cabinet, dead center to all 4 speakers aiming for the logo plate. You can use this for other closed back cabinets as well, except their logo’s might not be in the same position. On the typical 4x12 speaker cabinet (like the standard Marshall 1960 model), the four speakers usually become additive at a distance of 15 to 24 inches from the cabinet center (depending upon the speakers).
Using Two Mics
As much of a variety as you can get with one mic, you’ll get a lot more with two. Over the years, many engineers discovered that they could more closely capture the sound that they were hearing in the room by adding a second microphone. Here are some examples.
 |
| SM57 and MD 421 On Guitar Amp |
The Classic Two Mic Setup
Place the SM57 near or against the grill cloth as in the classic method #1 above. Now add a Sennheiser MD 421 at the same position to the right of the 57, but aimed at a 45 degree angle pointing towards the voice coil. Many sounds can be achieved from this setup by summing the mics at different levels and by flipping the phase on one. Of course, you can use any mics you choose, but the classic setup uses the 57 and 421.
 |
| Miking The Rear Of An Open Back Cabinet |
Two Mic Variation #1
With an open-back amplifier (like a typical Fender), place a mic about a foot away from the rear of the amp, off center from one of the speakers, while using any of the single mic setups for the front of the cabinet. Usually you’ll have to flip the phase on the rear mic, but try both positions and use the one that has the most low-end.
 |
| Additional Distance Mic Added To Close Mic |
Two Mic Variation #2
While using the mic setting from the single mic Classic #1 with the mic close to the grill of the cabinet, add an additional mic at the spot where the sound of the speakers converge 18 to 24 inches away. This distance might be increased to as much as 6 feet depending upon the size and sound of the room, which will then increase the captured ambience.
Other guitar amp miking setups can be far more sophisticated using a lot more mics, but one of these methods can get you where you need to go most of the time.
Other guitar amp miking setups can be far more sophisticated using a lot more mics, but one of these methods can get you where you need to go most of the time.
To read additional excerpts from The Ultimate Guitar Tone Handbook as well as my other books, go to bobbyowsinski.com.
----------------------------------
You should follow me on Twitter for daily news and updates on production and the music business.
Don't forget to check out my Music 3.0 blog for tips and tricks on navigating social media and the new music business.


2 comments:
THANK'S FOR SHARE THIS
I find that there's always a "sweet spot" for the sound I'm looking for. The trick is finding it.
My first "studio" was in an apt that had a nice high ceiling and hardwood floor. I found that if I put a mic about a foot away from my amp and another one about 6feet away facing the floor at a 45degree angle I got a magical sound. Wasn't useful for every thing but it sounded great on that track.
Since then I've discovered that the varieties are endless and the real key is having a "picture" of the sound I'm looking for firmly in mind before I start experimenting.
Great post!
Cheers
Post a Comment