Get This Free Cheat Sheet Guaranteed To Help Your Next Mix

Friday, June 6, 2014

Rich Tozzoli On Today's Inner Circle Podcast

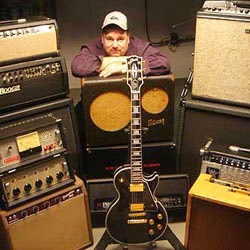
Television composer Rich Tozzoli image
The next Inner Circle Podcast has been posted and this one's guest is television composer and author Rich Tozzoli. Rich and I will discuss the ins and outs of writing and recording music for television as well as some of the gear that he uses.

Rich was also my co-author on The Ultimate Guitar Tone Handbook and you probably know him for his columns in Pro Sound News and Premier Guitar.

To catch the podcast, click on BobbyOInnerCircle.com or go directly to iTunes.

Also, if you dig the podcast, be sure to leave a short comment on iTunes. It's very helpful.

And please, let me know what you like or don't like about the show as well.
----------------------------------

Thursday, June 5, 2014

The Police "Message In A Bottle" Isolated Bass

The Police was one of the biggest bands in the world in the 80s thanks to great hooks, vocals and musicianship. Some of this is on display on this isolated bass track from the band's big hit "Message In A Bottle," from the band's second album Regatta de Blanc. It's easy to think of Sting as a singer and songwriter, but he's an excellent bass player as well, as you'll hear.  Here are some things to listen for.

1. The song was cut live with the entire band playing, as you can clearly hear both the guitar and drum leakage.

2. The bass part is very solid, but there are a few very minor timing mistakes (especially in the chorus) that we'd probably fix today.

3. There's an overdub at the end of interlude after the first chorus before the second verse begins at 1:06. You can hear the leakage go away and the sound of the bass change.

4. It sounds like the outro is from another take as the audio drops out, then changes slightly at 3:23.

5. Sting changes the bass part slightly on the outro, turning the bass riff around.

If you like looking at the x-rays of songs like this, check out my Deconstructed Hits book series.


----------------------------------

Wednesday, June 4, 2014

Creating Rhythms Through Convolution Processing

One of the coolest things about most large budget movies is that all of the sound design is created specifically for only that movie and traditional sound libraries are rarely used. Wouldn't it be cool to take the same approach to the sounds we use in music as well?

Here's a great video by my buddy Diego Stocco who shows how to turn ordinary sounds into something more musically usable by using convolution. A convolution engine works by taking a series of impulse responses (samples) to create a new but related representation of the sample. This is the process behind the various "modeling" devices that digitally mimic microphones, signal processors and amplifiers. Diego specializes in this process when it comes to sound effects, and may be its greatest practitioner, so you're seeing the best at work.

You can watch additional videos and read more about what he does in this article, or on his website at diegostocco.com.

----------------------------------

Tuesday, June 3, 2014

How To Avoid Electronic Phase Cancellation On A Drum Kit

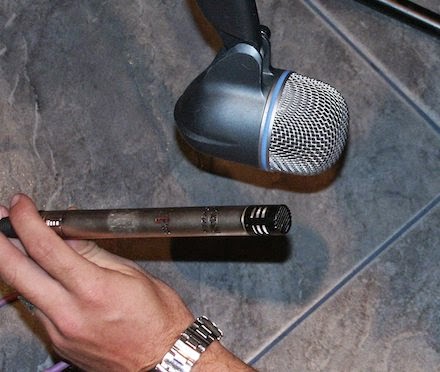
Checking Microphone Polarity image
Things happen in the course of a recording session. Knobs get turned, switches get flipped, plugins are bypassed and then forgotten about later, which can result in something sounding not quite right.

A big problem when recording drums is phase cancellation because there are so many mics normally used. Here's an excerpt from the 3rd edition of The Recording Engineer's Handbook that will show you a foolproof way of avoiding electronic phase cancellation on your kit.

"One of the things that you’ll see frequently throughout this book are references to a phenomena known as “phase cancellation.” One of the most overlooked aspects of recording is how microphones interact with each other, both acoustically and electrically. 
The reason why this is a concern is that it only takes a single out-of-phase mic to destroy the sound of a multi-miked instrument like a drum kit, and if not corrected, the sound may never be able to be fixed.

There are two types of phase cancellation; electronic and acoustic. Most of the phase problems we’ll discuss in the book are acoustic in nature, but  there’s also an instance of electronic phase cancellation that you should know about as well. Keep in mind that this has nothing to do with mic placement as it’s strictly an electronic problem that never shows up until multiple mics are used.

Electronic phase problems are almost always caused by a cable in the studio (usually a mic cable) that’s been mis-wired during an install, repaired incorrectly, or originally wired incorrectly from the factory (which is rare). The polarity check is used mainly to be sure that all mics are pushing and pulling the same way and to check for mis-wired cables, which happen more than you’d think even in some of the best facilities in the world. 

Checking The Polarity
Checking microphone polarity should be one of the first things that an engineer does after all the mics are wired up and tested, especially if you’re working in an unfamiliar studio. This is especially true before a tracking session where a lot of mics will be used, since having just one mic out of phase can cause an uncorrectable sonic problem that will most likely haunt that recording forever. A session that is in-phase will sound bigger and punchier while just one out-of-phase mic can make the entire mix sound tiny and weak.

For this test we’ll be using the phase switch on the mic preamp, DAW interface or console, since it’s really a polarity switch that changes the phase by 180 degrees at all frequencies by swapping pins 2 and 3 of a balanced microphone line. Here’s the test:

1. After the mics are set up, wired and checked, but not necessarily placed, pick one mic that can be easily moved. This can be a scratch vocal mic, a hat mic, or a guitar mic; it doesn’t matter as long as it works, sounds good to begin with (meaning that it’s not defective) and can move next to the farthest mic used in the session. This mic will become our “gold standard.”

2. With the gold standard mic in hand, move it next to the kick drum mic (or any other mic that you wish to test for that matter). Place both mics together so the capsules touch and speak into them from about a foot away (the distance isn’t critical - see the figure on the left).

3. Bring up the faders on both mics so the audio level (not the fader position) is equal on both. You can check this by making sure that the level meters read the same.

4. Flip the phase of the mic under test (in this case, the kick mic) and choose the position that gives you the most low end.

5. Repeat with all the other mics used on the session.

Remember, you’re not flipping the phase of the gold standard mic; only the one that you’re testing."

To read additional excerpts from The Recording Engineer's Handbook 3rd edition and my other books, go to the excerpts section of bobbyowsinski.com.
----------------------------------

Monday, June 2, 2014

Inside The Tom Scholz Guitar Sound

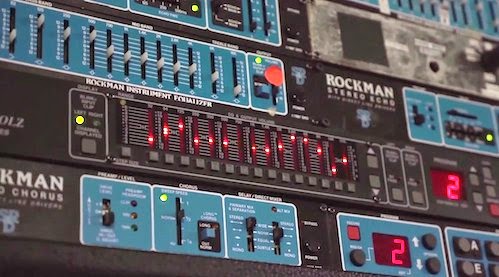
Tom Scholz Rockman Gear Rack image
Tom Scholz is the genius behind the classic band Boston, but he's also responsible for the rise in the processed guitar sound that directly lead to the big guitar racks of the 80s and even today's pedalboards. Scholz's sound and subsequent guitar products influenced not only guitarists of his generation, but every electric guitar player since.

Here's an interesting video taken behind the scenes in Toms personal studio where he shows many of the secrets to that great Boston guitar sound. There's not a lot of details since it's an NPR video, but it's interesting nonetheless.


----------------------------------
Sunday, June 1, 2014

New Music Gear Monday: The Magic AB Plugin

Calibrating your ears before you mix is an essential part of the preparation process for most engineers. Playing a few CDs or files that you know sound great gets you in tune with your speakers and environment. It's also great to switch back to those songs every so often during a mix just to make sure that you're on track frequency-wise.

In the DAW world, this is more complicated than it should be, since you have to import the songs into the session, which takes time and system resources. That's all in the past now, thanks to Sample Magic's ingenious Magic AB plugin.

Magic AB lets you instantly compare your current mix to any of 9 other tracks with just a mouse click. Plus you can set loops, playback points and even adjust the volume of each file, so you can also compare to the exact point in the song that's needed. It will also accommodate a variety of audio file formats, all without having to import them into the session.

This is a great tool for someone just learning how to mix, since being able to compare what you're doing with other tracks is a great way to learn quickly. That said, experienced engineers will also find it useful for getting a feel for a new mixing environment or speakers, or just as a quick check during a mix.

Sample AB is available at the Samplemagic.com for $58.50 (although you can pay in British Pounds or Euros as well). Here's a Quick Start video on how the plugin works.


----------------------------------
LinkWithin

Related Posts Plugin for WordPress, Blogger...