Get This Free Cheat Sheet Guaranteed To Help Your Next Mix

Showing posts with label Audio Mixing Bootcamp. Show all posts

Wednesday, May 4, 2016

How To Time Your Reverb Decay To The Track

How To Time Reverb Decay To The Track image
Reverb Front To Back
When signal processing is timed to the pulse of the track, everything in the mix sounds a lot smoother. This applies to compressors, delays, modulators, and especially reverbs.

One of the questions I get a lot is, "How do you time your reverb to the track?"

There's a step by step tutorial in my Audio Mixing Bootcamp book that I've excepted from the Adding Reverb chapter of the book  below. By the way, there's also a video version of the book available on Lynda.com.

––––––––––––––––––––––––––––––––
"Like with other aspects to mixing, the use of reverb is frequently either overlooked or misunderstood. Reverb is added to a track to create width and depth, but also to dress up an otherwise boring sound. The real secret is how much to use and how to adjust its various parameters.

Before we get into adding and adjusting the reverb in your mix, let’s look at some of the reasons to add reverb first

When you get right down to it, there are four reasons to add reverb.

1. To make the recorded track sound like it’s in a specific acoustic environment. Many times a track is recorded in an acoustic space that doesn’t fit the song or the final vision of the mix. You may record in a small dead room but want it to sound like it was in a large studio, a small reflective drum room, or a live and reflective church. Reverb will take you to each of those environments and many more.

2. To add some personality and excitement to a recorded sound. Picture reverb as makeup on a model. She may look rather plain or even only mildly attractive until the makeup makes her gorgeous by covering her blemishes, highlighting her eyes, and accentuating her lips and cheekbones. Reverb does the same thing with you tracks in many cases. It can make the blemishes less noticeable, change the texture of the sound itself, and highlight it in a new way.

3. To make a track sound bigger or wider than it really is. Anything that’s recorded in stereo automatically sounds bigger and wider than something recorded in mono, because the natural ambience of the recording environment is captured. In order to keep the track count and data storage requirements down, most instrument or vocal recordings are done in mono. As a result, the space has to be added artificially by reverb. Usually, reverb that has a short decay time (less than one second) will make a track sound bigger.

4. To move a track further back in the mix. While panning takes you from left to right in the stereo spectrum, reverb will take you from front to rear (see the figure on the left). An easy way to understand how this works is to picture a band on stage. If you want the singer to sound like he’s in front of the drum kit, you would add some reverb to the kit. If you wanted the horn section to sound like it was placed behind the kit, you’d had more reverb. If you wanted the singer to sound like he’s in between the drums and the horns, you’d leave the drums dry and add a touch of reverb to the vocal, but less than the horns.

If we were going to get more sophisticated with this kind of layering, we’d use different reverbs for each of the instruments and tailor the parameters to best fit the sound we’re going after.

Timing A Reverb To The Track
One of the secrets of hit-making engineers is that they time the reverb to the track. That means timing both the pre-delay and the decay so it breathes with the pulse of the track. Here’s how it’s done.

The decay of a reverb is timed to the track by triggering it off of a snare hit and adjusting the decay parameter so that the decay just dies by the next snare hit. The idea is to make the decay “breathe” with the track.

Exercise Pod - Timing Reverb Decay
Before you begin any of the exercises in this chapter, be sure to have two reverbs with the sends and returns already set up. Set one reverb to “Room” (we’ll call it Reverb #1) and the other to “Hall” (Reverb #2). Refer to your DAW or console manual on how to do this.

E8.1: Solo the snare drum and the reverb returns (or put them into Solo Safe - refer to you DAW or console manual on how to do this). Be sure that the Dry/Wet control is set to 100% wet, and the return levels are set at about -10.

A) Raise the level of the send to the Room reverb until the reverb can be clearly heard. Does the snare sound distant? Does it sound bigger than before?

B) Adjust the Decay parameter until the reverb dies out before the next snare hit of the song. Does the snare sound clearer? 

C) Mute the send to the Room reverb and raise the level to the Hall reverb. Does the snare sound distant? Does it sound bigger than before? Does it sound bigger than the Room reverb?

D) Adjust the Decay parameter until the reverb dies out before the next snare hit of the song. Does the snare sound clearer? Does it sound bigger?

E) Adjust the Decay parameter until the reverb dies out before the 2nd next snare hit after the initial hit. Does the snare sound clearer? Does it sound bigger?"

––––––––––––––––––––––––––––––––


Wednesday, March 9, 2016

5 Steps To Punchy Drum Compression

Drum Compression imagePunchy drums are what every engineer aims for in a mix and there's definitely a way to get there. Sometimes just using the right compressors can do the trick, but most of the time it requires some adjustment of the parameters to really get the sound you're looking for.

Here's a few excerpts from my Mixing Engineer's Handbook, Audio Mixing Bootcamp and Drum Recording Handbook books all culled together for an overview on drum compression.

"It would be great if every drummer hit every beat on the kick and snare with the same intensity, but unfortunately that doesn’t even happen with the best drummers on the planet. When the intensity changes from beat to beat, the pulse of the song feels erratic, since even a slight change in level can make the drums feel a lot less solid than they should be. Compression works wonders to even out those erratic hits and helps to push the kick and snare forward in the track to make them feel more punchy. Let’s take a look at how to do that with the drums.

The Compression Technique
Before we get into specifics, here’s the technique for setting up a compressor. Regardless of the instrument, vocal or audio source, the set up is basically the same.
1. Start with the attack time set as slow as possible, and release time set as fast as possible on the compressor. 
2. Turn the attack faster until the instrument begins to sound dull (this happens because you’re compressing the attack portion of the sound envelope). Stop increasing the attack time at this point and even back it off a little so the sound stays crisp.
3. Adjust the release time so that after the initial attack, the volume goes back to at least 90 percent of the normal level by the next beat. If in doubt, it’s better to have a shorter release than a longer one.
4. Set to the lowest ratio above 1:1 (which means no compression). Usually on drums, the lowest ratio provides the most punch, since it lets the transients of the drum be heard. 2:1 or 1.5:1 work great.
5. Bypass the compressor to see if there’s a level difference. If there is, increase the Gain or Output control until the volume is the same as when it’s bypassed.
Tracking Versus Mixing
Generally speaking, most engineers won’t compress much, if at all, during tracking, since anything you do while recording can’t be undone later. That said, some engineers like to limit the instruments a little (only by a dB or two) just to control the transients a bit. A compressor becomes a limiter when the ratio is set to 10:1 or more. If you choose to do this, make sure that the limiter kicks in on only the highest peaks. If it’s limiting constantly, it’s probably too much and you might regret it later since it can't be undone. Decrease the threshold control so it only limits on the occasional transient.

Compressing The Kick And Snare
The biggest question most engineers have when compressing either the kick or snare is “How much is enough?” This depends first and foremost on the sound of the drum itself and the skill of the drummer. A well-tuned drum kit that sounds great in the room should record well, and a reasonably good drummer with some studio experience usually means that less compression is needed because the hits are fairly even. Even a great drummer with a great sounding kit can benefit from a bit of compression though, and as little as a dB or two can work wonders for the sound. With only that amount, the setup of the compressor is a lot less crucial, especially the attack and release.

Sometimes you need the kick or snare to cut through the mix and seem as if it’s in your face, and that’s when 3 to 6dB or so does the job. It’s here that the setup of the compressor is critical because you’re imparting its sound on the drum. Make sure you tweak the attack and release controls as above, and even try a number of different compressors. You’ll find they all react differently, even with the same settings, so it’s worth the time to experiment. Remember: if the attack is set too fast, the drum will sound less punchy, regardless of how much compression you use.

Compressing The Room Mics
The room ambient mics are meant to add the “glue” to the sound of a kit, and can really benefit from a fair amount of compression, which means anywhere from 6 to 10dB. In fact, many mixers prefer the room sound to be extremely compressed, with way more than 10dB being the norm.

The problem is that the more compression you use, the more the ambience of the room is emphasized. That’s okay if you’re recording in a great sounding room, but if it has a lot of reflections and the ceiling is low, you may be emphasizing something that just doesn’t add much to the track. One trick is to actually set the attack time so it’s much shorter than usual to cut off the sound of the initial drum transient, then tuck the room tracks in just under the other drum tracks.

Note that regardless of how good the room mics sound, the more of them you use, the less space there will be for the other instruments in the track. The more instruments there are, the more you’ll have to back them off. Sad but true, but unfortunately, there’s only so much sonic space to any mix."


Wednesday, February 10, 2016

4 Reasons To Add Reverb To A Track

Reverb front to back imageLike many other aspects to mixing, the use of reverb is frequently either overlooked or misunderstood. Reverb is sometimes added to a track to create width and depth, but also to dress up an otherwise boring sound. The real secret is how much to use and how to adjust its various parameters.

Let’s look at some of the reasons to add reverb in this excerpt from my Audio Mixing Bootcamp book.

When you get right down to it, there are four reasons to add reverb.

1. To make the recorded track sound like it’s in a specific acoustic environment. Many times a track is recorded in an acoustic space that doesn’t fit the song or the final vision of the mixer. You may record in a small dead room but want it to sound like it was in a large studio, a small reflective drum room, or a live and reflective church. Reverb will take you to each of those environments and many more.

2. To add some personality and excitement to a recorded sound. Picture reverb as makeup on a model. She may look rather plain or even only mildly attractive until the makeup makes her gorgeous by covering her blemishes, highlighting her eyes, and accentuating her lips and cheekbones. Reverb does the same thing with some tracks. It can make the blemishes less noticeable, change the texture of the sound itself, and highlight it in a new way.

3. To make a track sound bigger or wider than it really is. Anything that’s recorded in  stereo automatically sounds bigger and wider than something recorded in mono, because the natural ambience of the recording environment is captured. In order to keep the track count and data storage requirements down, most instrument or vocal recordings are done in mono. As a result, the space has to be added artificially by reverb. Usually, reverb that has a short decay time (less than one second) will make a track sound bigger.

4. To move a track further back in the mix. While panning takes you from left to right in the stereo spectrum, reverb will take you from front to rear (see the figure on the left). An easy way to understand how this works is to picture a band on stage. If you want the singer to sound like he’s in front of the drum kit, you would add some reverb to the kit. If you wanted the horn section to sound like it was placed behind the kit, you’d had more reverb. If you wanted the singer to sound like he’s in between the drums and the horns, you’d leave the drums dry and add a touch of reverb to the vocal, but less than the horns.

If we were going to get more sophisticated with this kind of layering, we’d use different reverbs for each of the instruments and tailor the parameters to best fit the sound we’re going after.


Tuesday, January 13, 2015

A Look At Drum EQ Points

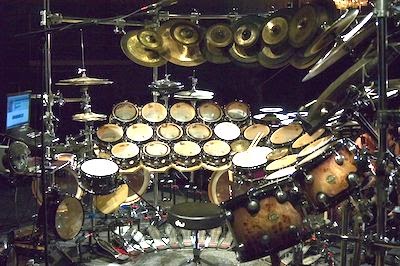
massive drum kit image
Musicians and songwriters often have trouble with EQing drums so they fit in a track. A lot of that comes from over-EQings already good sounding samples, or having to deal with poorly recorded drums to begin with, but even so, the basic technique isn't that difficult if you know the basics.

Here's an excerpt from my Audio Mixing Bootcamp book that shows some basic EQ points for each drum and cymbal. Although these points may change slightly depending upon the drum kit, drummer, tuning, arrangement and song, they're pretty much in the ballpark. Just remember that you usually don't need a lot of EQ to make a difference on a well-recorded kit.

"The drums present an interesting dilemma - does the song demand that the drum kit works as a whole, or should the snare or kick stand out? Once again, it depends upon the song, but we can take a look at both approaches.

The kick and snare are extremely important in modern music because the kick is the heartbeat and the snare drives the song. By simply getting the sound and balance of these two drums right, it’s possible to change a song from dull to exciting.

There are certain frequencies on different drums that you should be aware of.
Kick - Girth at 50Hz and below, bottom at 80 to 100Hz, hollowness at 200 to 400Hz, point at 3k to 5kHz 
Snare - Fatness at 120 to 240Hz, point at 900Hz to 2kHz, crispness at 5kHz, snap at 10kHz 
Hat - Clang at 200Hz, sparkle at 8k to 10kHz 
Rack Toms -  Fullness at 240 to 500Hz, attack at 5k to 7kHz 
Floor Tom - Fullness at 80Hz, attack at 5kHz 
Cymbals - Clang at 200Hz, sparkle at 8k to 10kHz
These frequencies are not cut and dried for each drum kit, since the size of the drum or cymbal and the material they’re made of contributes greatly to the tone. Remember to sweep the frequencies around each of the above to find the correct frequency for that particular drum or cymbal.

Beware that boosting from 40 to 60Hz too much may make the kick sound big on your speakers, but it might not be heard when played back on smaller speakers. Also remember that the ideal spot for a 22 inch kick drum (which is the most commonly used) is around 80Hz."

To read additional excerpts from The Audio Mixing Bootcamp book and my other books, go to the excerpts section of bobbyowsinski.com. You also might want to check out my Audio Mixing Bootcamp video series on Lynda.com.

Thursday, November 27, 2014

Black Friday Special


It's Black Friday but I'm not selling anything. Instead I want to give you a Holiday gift by giving you 10 days to enjoy my video courses on lynda.com for free.

If you're not hip to Lynda.com, then you really should be. It has over 3,000 video courses that cover essential training for software like Final Cut, Photoshop, Pro Tools and more, as well as how-to courses in social media (like the ones I authored), marketing and business.

Here are my lynda.com courses to check out.
Audio Mixing Bootcamp - If you just can't seem to get the hang of mixing (and it really is an art) or want your mixes to be better, then check out this video course. It covers just about everything you need to know to step up your mixing game.

Audio Recording Techniques - This course shows you the basic techniques for recording just about any instrument, including strings and horns as well as drums, percussion, bass, keys, guitars, vocals and background vocals. Watch a song being recorded from the basic tracks to overdubs right through to the rough mix. 

Music Studio Setup and Acoustics - Sometimes your recordings and mixes just don't sound right not because of your technique, but because of your room! Regardless if you're mixing in your bedroom or recording in your garage, this course will help you improve the acoustics of your room in no time as it shows you how to build your own bass traps and acoustic panels.

Audio Mastering Techniques - Mastering is something that we'll all forced to do ourselves in one situation or another. Now you can learn the techniques used by the pros.

Mastering For iTunes - iTunes has had a high-resolution audio program for a couple of years now as it slowly builds its hi-res catalog. Here's everything you need to know about it, as well as all about the tools and how to use them.

Remember, you can also use the 10 free days to check out all the other lynda.com courses too. Enjoy!
----------------------------------

Tuesday, July 15, 2014

The 4 Families Of Compressors

compressors image
Ever wonder why there are so many different compressors and why they all sound different? That's because back in the analog days there were a number of different ways to achieve compression depending upon the type of electronic building block that you used. Here's a brief excerpt from The Mixing Engineer's Handbook that covers the 4 families of compressors that we generally use today.

"In the days of analog hardware compressors, there were four different electronic building blocks that could be used to build a compressor. These were:
  • Optical: A light bulb and a photocell were used as the main components of the compression circuit. The time lag between the bulb and the photocell gave it a distinctive attack and release time (like in an LA-2A). Optical compressors don't react very fast to the oncoming signal, but that actually makes then sound pretty smooth, which is why they've become a favorite on vocals and bass.
  • FET: A Field Effect Transistor was used to vary the gain, which had a much quicker response than the optical circuit (a Universal Audio 1176 is a good example). FET compressors are often used on drums because of their quick response.
  • VCA: A Voltage Controlled Amplifier circuit was a product of the 80s and had both excellent response time and much more control of the various compression parameters (the dbx 160 series is an example of a VCA-type compressor, although some models didn’t have a lot of parameter controls). VCA compressors can be very aggressive, which is why the dbx 160 series have long been a favorite on rock kick and snare.
  • Vari-Gain: The vari-gain compressors are sort of a catch-all category because there are other ways to achieve compression besides the first three (like the Fairchild 670 and Manley Variable Mu). You might think of a vari-gain as the ultimate smooth sounding compressor because it was originally made for a radio signal chain, something that had to be as transparent as possible. That said, it's hard to beat a vari-gain compressor across the mix buss for the added "glue" that's difficult to get any other way.
As you would expect, each of the above has a different sound and different compression characteristics, which is the reason why the settings that worked well on one compressor type won’t necessarily translate to another. The good thing about living in a digital world is that all of these different compressor types have been duplicated by software plugins, so it’s a lot easier (not to mention cheaper) to make an instant comparison on a track and decide which works better in a particular situation."

To read additional excerpts from The Mixing Engineer's Handbook and my other books, go to the excerpts section of bobbyowsinski.com. Also check out The Audio Mixing Bootcamp video course on Lynda.com.
----------------------------------

Tuesday, June 17, 2014

5 Steps To Checking Your Drum Phase When Mixing

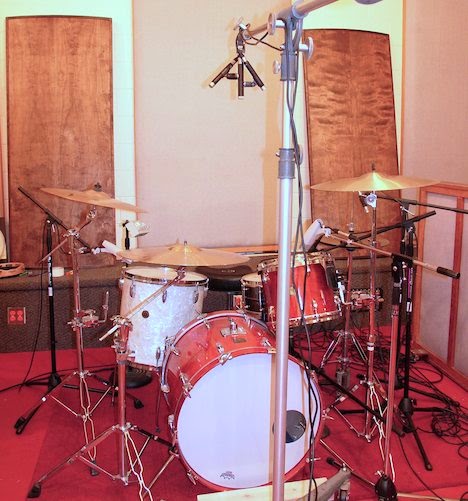
Drum kit with ORTF overheads imageOne of the most important yet overlooked parts of a drum mix is checking the phase of the drums. This is because not only will an out-of-phase channel suck the low end out of the mix, but it will get more difficult to fix as the mix progresses.

I covered how to check the polarity of the drum mics a few weeks ago, but here's an excerpt from my Audio Recording Basic Training book (also covered in the Audio Mixing Bootcamp book) that covers a way to check the phase when you're setting up for a mix as well.

"A drum mic can be out of phase due to a mis-wired cable or poor mic placement. Either way, it’s best to fix it now before the mix goes any further.

1) With all the drums in the mix, go to the kick drum channel and change the selection of the polarity or phase control. Is there more low end or less? Chose the selection with the most bottom end.

2) Go to the snare drum channel and change the selection of the polarity or phase control. Is there more low end or less? Chose the selection with the most bottom end.

3) Go to each tom mic channel and change the selection of the polarity or phase control. Is there more low end or less? Chose the selection with the most bottom end.

4) Go to each cymbal mic or overhead mic and change the selection of the polarity or phase control. Is there more low end or less? Chose the selection with the most bottom end.

5) Go to each room mic channels and change the selection of the polarity or phase control. Is there more low end or less? Chose the selection with the most bottom end."

You'd be surprised how many times that flipping the phase on one or two of the drum mic channels results in a better, fuller sounding kit, even on one that's well-recorded.

To read additional excerpts from the Audio Recording Basic Training book or any of my other books, go to the excerpts section of bobbyowsinski.com.
----------------------------------

Tuesday, May 20, 2014

2 Exercises To Find the Groove Of A Mix

Rhythm Section
Regardless of the genre of music, a mix will never be any good unless the song's groove is emphasized. Sometimes it's not easy to find and develop the groove, however, so here's a couple of exercises from the Audio Mixing Bootcamp to help you find it.


"The groove is the pulse of the song. While it usually comes from the drums and bass, it could really come from any instrument or even a vocal. And lest you think that the groove is predominantly a fixture of one type of music like funk or R&B, you’ll find that a strong groove exists in just about any type of good music, regardless of the genre or style. Don’t believe me? Listen to the US Marine Corps band play “Stars And Stripes Forever” and then listen to a typical high school band. The Marines have a groove that makes you want to jump up and march with them just as much as you want to shake your booty to a James Brown or Prince song.

The best way to develop the groove is to find the instrument or instruments in the song that supplies its pulse. As said before, it’s usually the bass and drums, but it could very well be a loop, a keyboard, a guitar, and rarely, a vocal. If a band is playing particularly well together, it may be several instruments at the same time.

Exercise 1: Finding The Groove
A) Listen to the entire mix all the way through. Is there an instrument or instruments that establishes the pulse of the song?

B) If an instrument doesn’t stick out as being the pulse of the song, go through each track one by one and raise the level by about 3 dB. After you’ve listened, return it to its previous level position. Do you hear one or more tracks as establishing the pulse of the song now?

Understand that if you’re working on a song that wasn’t well performed, there may not be a track that establishes the groove. If that’s the case, it’s usually the producer’s call to recut the track, or you’ll just have to make due with the instrument that feels the best. Remember that mixing is always easier with well recorded tracks, great playing, and excellent arrangements.

Establishing The Groove
Once the instrument (or instruments) that establishes the groove is found, the next step is to emphasis it. This can be done by raising the level as little as one dB, or adding an extra bit of compression or EQ to make it stand out a bit more in the mix. Then make sure that the rest of the tracks support your groove instrument by tailoring the mix around it.

Take notice in the exercises below that we’re adding very small increments of level, compression or EQ. In theory, one dB is the minimum amount that the average person can hear according to most text books (it’s actually less than that), and sometimes that’s all you need to change the balance or feel in a mix. On just about anything in mixing, always begin with small increments first.

Exercise 2: After your groove tracks are found, try one or more of the following:
A) Raise the level of each of the groove tracks by one dB. Can you feel the groove better? If not, add another dB. Can you feel it now? If not, add another dB, but be cautious not to make the tracks too far out in front of the mix.

B) If your groove tracks are already being compressed, add another dB or two of compression. Keep the level the same by adjusting the Output control or raising the channel fader. Can you feel the groove better? If the groove tracks aren’t compressed, then refer back to Chapter 6 and add compression.

C) If your groove tracks are already equalized, add an additional dB at the EQ points. Can you feel the groove better? If not, add another dB. Can you feel it now? Be cautious that the tracks are not too far out in front of the mix or that they don’t clash with another instrument.


D) After the groove is established and drives the mix, do any final tweaks to the other tracks to make sure they’re not covered up or that they don’t clash with the groove tracks."

----------------------------------

Tuesday, May 13, 2014

6 Exercises To Help You Visualize Your Mix


Visualize your mix image
The essence of mixing is the balance between instruments or mix elements. No matter how good you are at other aspects of the mixing process, if you don’t get the balance right, you don’t have a mix. Here are some questions to ask yourself as well as 6 exercises taken from my Audio Mixing Bootcamp book that will help you visual your mix before you begin.

"Most mixers can hear some version of the final product in their heads before they get too far into the mix. This is because they’ve heard rough mixes of the song many times before during production, but even if a mixer is brought in just for the mix, they listen to all the elements several times before they really get down to mixing.

If you’re just starting out mixing, you might think, “How can I hear the final product before I’ve even begin?” That’s a fair enough question. Until you have a certain amount of experience, you need a few questions to help mold your vision a bit, and the way to do that is to go back to the six mix elements and ask yourself:
  • How do I hear the final balance?
  • How do I hear the instruments EQed”
  • How do I hear everything panned?
  • How do I hear everything compressed?
  • How do I hear the ambience in the track?
  • What do I hear as the most interesting thing in the track?
If you can answer these questions, you may still not have a full picture of your final mix, but you’ll have at least a general idea, which is the first step to a great mix.

Keep in mind that the producer and musicians have a say in the mix as well, and your version of the mix can suddenly take a wide left turn with their input. That’s okay, because after you’ve gotten everything to the point where you hear it in your head (or even beyond), a left turn should be easy.

1: Either listen to a rough mix of the song you’re working on, or quickly just push up all the faders for a rough balance to the song you’re about to mix. Let’s think about the balance.
   A) How loud do you hear the drums in the final mix? The bass?
   B) Do you hear the vocals out in front, or back in the track?
   C) How loud do you hear the primary musical elements that carry the song?
   D) How loud do you hear the secondary elements like percussion and background vocals?

2: Now let’s think about the frequency response of the various instruments.
   A) Is there an instrument or two that sounds particularly dull?
   B) Is there an instrument or two that sounds overly bright?
   C) Is there an instrument that has too much bottom end?
   D) Is there an instrument that has no bottom end at all?

3: Now let’s think about the panning.
   A) How do you hear the drums panned? Wide or narrow?
   B) How do you hear the panning of any instruments that were recorded in stereo?
   C) Do you hear any instruments panned extreme wide left and right?
   D) What instruments do you hear panned up the middle?

4: Now let’s go to compression.
   A) Is there an instrument or vocal that has wild dynamic shifts that needs compression?
   B) Is there an instrument or vocal that you’d like to change the sound by using compression?
   C) Is there an instrument or vocal that needs to sound a little more punchy?

5: Let’s think about the ambience.
   A) What instruments were recorded with room ambience or reverb?
   B) Do you hear ambience on the drums or snare?
   C) What instruments do you hear rather dry and in your face?
   D) What instruments do you hear further away from you?

6: Lastly, it’s time to thing about the interest.
   A) What’s the most important element in the mix?
   B) If there isn’t one yet, how can I create one?
   C) What’s the next most important element in the mix?
   D) What’s the next most important element in the mix?

These aren’t all the questions that you can ask yourself about a mix, but you get the idea. Remember, there are no right or wrong answers. It’s as you visualize it in your head."

----------------------------------

Monday, February 24, 2014

Enhance Your Hearing With Darkness

Mixing Console image
Conventional mixing wisdom has always had it that a little bit of quiet before you mix can help you better zero in on the details of a mix. In fact, that's one of the tips in personal prepping for your mix as outlined in The Mixing Engineer's Handbook and Audio Mixing Bootcamp books.
"Try to stay in the most quiet area that you can for as long as you can before you begin your mix. Concentrate on the sounds that you’re hearing and try to identify what they are and the direction they’re coming from. Studies have found that this can make your hearing much more acute."
The books go on to provide another useful tip that many mixers employ while mixing that many dub The Ray Charles Effect:
"Also remember that closing your eyes while mixing can sometimes improve your hearing by both lessening the distractions and allowing your brain to concentrate additional processing power on that sense."

While this was mostly empirical knowledge, a new study by researchers at the University of Maryland and Johns Hopkins University have found that a temporary loss of vision does indeed improve your hearing. The findings were published in the peer review publication Neuron and found that the brains of adult mice could be rewired to compensate for vision loss by improving their hearing. 

Of course, anyone who has spent at a little time around Stevie Wonder knows how acute his sense of hearing is, as is that of all blind people. We didn't need a study to confirm that.

But what it does confirm is that by just sitting in a quiet dark room before you mix, or closing your eyes during a mix, can often allow you to zero in a things in a mix that you missed before. And lowering the lights in the mixing area has always been done for a good reason, whether we realized or not. Give it a try. Go to laboratoryequipment.com read a synopsis of the article.

----------------------------------

You should follow me on Twitter and Facebook for daily news and updates on production and the music business.

Don't forget to check out my Music 3.0 blog for tips and tricks on navigating social media and the new music business.

Tuesday, January 7, 2014

Do You Know The Difference Between Modulators?

While all modulation effects certainly don’t sound the same, not many engineers know the difference between them. Here's an excerpt from The Audio Mixing Bootcamp book that takes a look at the differences. 

"Modulation refers to an external signal that varies the sound of an instrument or vocal in volume, timing or pitch. This includes effects like chorus, flanging and phasing, which are pretty standard mixing tools, to tremolo and vibrato, which are used mostly on guitars and electric pianos.

Between reverb, delay and modulation, modulation is the least used mixing effect because a little goes a long way. And except for flanging, you’ll also hear modulation effects used mostly on a single track at a time, instead of across the entire mix. In fact, most modulation effects are inserted directly in the signal path of a channel instead of using a dedicated send and return configuration.

Modulation Differences Chart image from Bobby Owsinski's Big Picture blogThere are three modulation effects that are very closely related; phase shift, chorus, and flange. The simplest difference between them is that a chorus and flange effect comes from a modulated delay that’s mixed back into the original signal. The flanger uses a shorter delay than a chorus, usually much less than 5 milliseconds, but a phaser uses no delay at all (see the graphic on the left).

Going a bit deeper, flangers, phasers and choruses work by producing a series of frequency bandwidth notches that are slowly swept across the frequency spectrum of the instrument or vocal. You don't really hear these notches; you hear what's left in the frequency spectrum, which is a series of peaks. Phasers have a small number of notches spaced evenly across the frequency spectrum while flangers and choruses have a larger number that are spaced harmonically.


Tremolo and vibrato work a little differently because no delay is involved. Tremolo cyclically varies the signal up and down in level, while vibrato varies the tone cyclically up and down."

A bit of trivia - the term "flanging" was actually coined by none other than Beatle John Lennon while observing the effect being created by the engineer slowing the speed of one of the tape decks down by placing his thumb on the metal portion of the reel or tape, which is called a flange.

To read additional excerpts from The Audio Mixing Bootcamp and my other books, go to the excerpts section of bobbyowsinski.com.

----------------------------------

You should follow me on Twitter and Facebook for daily news and updates on production and the music business.

Don't forget to check out my Music 3.0 blog for tips and tricks on navigating social media and the new music business.

Tuesday, May 21, 2013

The Ins And Outs Of Subtractive Equalization

Offending frequency image
One of the most effective ways of equalizing is to use a method known as subtractive equalization. While the natural tendency is to boost when using the EQ, subtracting can be much more effective and sound better as well. In this excerpt from The Audio Mixing Bootcamp (a similar explanation can be found in latest 3rd edition of The Mixing Engineer's Handbook), you'll see just how easy and effective subtractive EQ can be.

"While it’s natural to believe that by adding some EQ here and there that you’ll make the instrument or vocal sound better, that’s not necessarily the case. There’s a very effective EQ technique called “subtractive equalization” that works by attenuating frequencies instead of boosting them. Many superstar mixers love this method because it makes the sound of the track more natural than if you boosted any of the frequencies. This is because every time you boost an EQ, there’s an slight amount of something called phase shift that’s added to the signal as a byproduct of the way an electronic equalizer works. By using subtractive equalization, you completely avoid this artifact. As a result, the track is better able to blend with the others.

Here’s how to use subtractive equalization:
1. Set the Boost/Cut control to a moderate level of cut (8 or 10 dB should work.)

2. Sweep through the frequencies until you find the frequency where the sound has the least amount of boxiness and the most definition.

3. Adjust the amount of cut to taste. Be aware that too much cut makes the sound thinner.

Alternately you can try a different approach.
1. Set the Boost/Cut control to a moderate level of boost (8 or 10 dB should work.)

2. Sweep through the frequencies until you find the frequency that really leaps out above all others. That’s the frequency to cut.

3. Adjust the amount of cut to taste. Be aware that too much cut makes the sound thinner.

There are two frequency ranges that are particularly effective when using subtractive equalization; from 400Hz to 600Hz and between 2k and 4kHz. The reason why 400Hz to 600Hz is chosen is because most directional microphones provide a natural boost in that frequency range because of the proximity effect brought about by miking an instrument or voice up close. Likewise, many mics that are known as good vocal mics have a presence boost between 2k and 4kHz. Cutting those frequencies a few dB (more or less as needed) can make the track sound much more natural than if you were to try to boost other frequencies instead.

These two problem areas usually crop up when you’re recording everything with the same microphone, since there’s a buildup in the those frequency areas as more and more instruments are recorded. By cutting a few dB from these frequency ranges you’ll find that the instruments sit better in the mix without every having to add as much EQ."

To read additional excerpts from this and other books, go to bobbyowsinski.com.

----------------------------------

You should follow me on Twitter for daily news and updates on production and the music business.

Don't forget to check out my Music 3.0 blog for tips and tricks on navigating social media and the new music business.

Wednesday, April 24, 2013

Checking The Drum Phase

As I've stated in many previous posts on recording, phase problems are one of the major sound destroyers, causing frequencies to cancel out in a way that they can never be recovered regardless of how much EQ you add later. That's why I've featured a section on checking and correcting phase in a number of books like The Audio Mixing Bootcamp, Recording Engineer's Handbook, Audio Recording Basic Training, and Drum Recording Handbook. Get this right, and you're way ahead of the game when it comes to making things sound good, especially the drums.

In this video from the Audio Recording Techniques course from Lynda.com, you'll see and hear one of the ways to correct phase problems on the drum kit either during recording or mixing. The examples are pretty apparent, and once you hear it once, you'll be aware of what to do and how to fix it forever.

You might like to see more of this or other Lynda courses, and you can click here for a free 7 day trial.


----------------------------------

You should follow me on Twitter for daily news and updates on production and the music business.

Don't forget to check out my Music 3.0 blog for tips and tricks on navigating social media and the new music business.

Wednesday, April 10, 2013

10 Tips For Better Effects Layering

Console Faders image from Bobby Owsinski's Big Picture production blog
Many inexperienced mixers tend to overlook any effects placed on a track as something they can get creative with during a mix and keep the settings static as a result. As most experienced mixers know, adjusting the effects to fit the track is every bit as important to the mix as the individual recorded tracks. Here's a list of 10 tips to help with your effects layering, taken from The Audio Mixing Bootcamp and Mixing Engineer's Handbook.

1. Long delays, reverb predelays, or reverb decay push the sound further away if they’re loud enough.

2. Shorter reverbs (less than 1 second) and shorter delays (less than 100 ms) makes the sound bigger.
    3. If delays are timed to the tempo of the track, they add depth without being noticeable.

    4. If delays are not timed to the track, they stick out.

    5. Reverbs work better if their predelay and decay time are timed to the tempo of the track.

    6. Layer reverbs by frequency with the longest being the brightest and the shortest a being the darkest, or vice-versa.

    7. Return the reverb in mono and pan accordingly. All reverbs needn’t be returned in stereo.

    8. Make things sound big with reverbs and get the depth from delays, or vice versa.

    9. Use a bit of the longest reverb on all major elements of the track to tie all the environments together.

    10. EQ your effects to make them fit in the track better by rolling off the highs and lows, and/or scooping out the mids in the 2kHz range.

    Keep these tips in mind during your next mix and see how much better your mix sounds.

    ----------------------------------

    You should follow me on Twitter for daily news and updates on production and the music business.

    Don't forget to check out my Music 3.0 blog for tips and tricks on navigating social media and the new music business.

    Wednesday, March 20, 2013

    How To Know When Your Mix Is Finished

    Controller faders image from Bobby Owsinski's Big Picture production blogOne of the hardest things for an inexperienced mixer to determine is when a mix is finished. In fact, engineers new to mixing may think a mix is ready in an hour when a pro might take considerably longer, but the quality would be better as well.  This excerpt from The Audio Mixing Bootcamp looks just how you'll know when your mix is ready for the world.

    "While many beginning mixers will fly through a mix and be finished in an hour, most mix veterans take a lot longer than that to get a mix together. As you’ve seen from the previous chapters, a fair amount of experimentation is required to find the parameter settings for EQ, compression and effects that work with the track.

    While rough mixes are done very fast by nature (they may only take a couple of passes through the song to get together), and you might occasionally get lucky with a quick mix, most veteran mixers usually figure it takes a five to twelve hour day to mix a song. Many mixers like to have an extra half-day to tweak things with a fresh ear, but many big-name, big-budget projects can take weeks of multiple mixes to sculpt it just right.

    Of course, if all you have is time, then you can mix a song way beyond its peak (the final mix for Michael Jackson’s hit “Billy Jean” was #2 out of 99), so it’s best to have a few guidelines as to when it might be finished.

    How To Know When Your Mix Is Finished
    You can consider a mix finished when the following occur:
    • You can feel the groove. Whatever element supplies the groove, it has to be emphasized so that the listener can feel it.
    • Every instrument or vocal can be clearly heard. If an instrument or vocal is unintentionally masked or covered by another instrument or vocal, then your mix isn’t finished.
    • Every lyric and every note of every line or solo must be clearly heard. Each note should be crystal clear. Tweak your fader automation to help this out.
    • Be sure the mix is punchy. This is usually a function of the bass and drum EQ and compression.
    • The mix has an interesting element. Make sure the most important element of the song is obvious to the listener.
    • Be sure your mix sounds good when you play it against other songs that you like. Consider it a job well done when this happens.
    If time is not a problem, do as many versions as you can until you feel satisfied with your creation. Mixing takes experience so the more time you put in, the better you get at it.

    Am I Finished Yet?
    A) Listen to the mix. Is the groove obvious? Can you feel it in the mix?

    B) Listen to the mix. Can every instrument be clearly heard?

    C) Listen to the mix but concentrate on the vocal. Can every lyric be heard?

    D) Is the mix punchy?

    E) Listen to the mix. What grabs your attention?

    F) Play your mix and then play your favorite song. If both songs were played on the radio back to back, would your mix stand up?"

    To read additional excerpts from The Audio Mixing Bootcamp and other books, go to BobbyOwsinski.com.

    ----------------------------------

    You should follow me on Twitter for daily news and updates on production and the music business.

    Don't forget to check out my Music 3.0 blog for tips and tricks on navigating social media and the new music business.

    Tuesday, January 8, 2013

    Rhythm Section Mix Balance Tips

    Rhythm section instruments from Bobby Owsinski's Big Picture blog
    The rhythm section is the heart and soul of a song as it provides both the pulse and the key center, and that's why it's so important to get the correct balance in a mix. It would be nice if everything sounded so good that you didn't have to add a thing but that's not usually the case. Here are a few tips taken from both The Mixing Engineer's Handbook and The Audio Mixing Bootcamp that can help get that rhythm section kicking.

    "In order to have the impact and punch that most modern mixes exhibit, you have to make a space in your mix for both of these instruments so they won't fight each other and turn the mix into a muddy mess. While simply EQing your bass high and your kick low (or the other way around), might work at it’s simplest, it’s best to have a more in-depth strategy, so to make them fit together, try the following:

    1. EQ the kick drum between 60 to 120Hz as this will allow it to be heard on smaller speakers. For more attack and beater click add between 1k to 4kHz. You may also want to dip out some of the boxiness that lives between 200 to 600Hz. EQing in the 30 to 60Hz range will produce a kick that you can feel if your speakers are large enough, but that can also make it sound thin on smaller speakers and probably won’t translate well to a variety of speaker systems. Most 22 inch kick drums like to center somewhere around 80Hz, for instance.

    2. Bring up the bass with the kick. The kick and bass should occupy slightly different frequency spaces. The kick will usually be in the 60 to 80Hz range whereas the bass will emphasize higher frequencies anywhere from 80 to 250 (although sometimes the two are reversed depending upon the song). Before you continue to EQ at other frequencies, try filtering out any unnecessary bass frequencies (below 30Hz on kick and 50Hz on the bass, although it varies according to style and taste) so the kick and bass are not boomy or muddy. There should be a driving, foundational quality to the combination of these two together.  

    A common mistake is to emphasize the kick with either too much level or EQ and not enough on the bass guitar. This gives you the illusion that your mix is bottom light, because what you’re doing is effectively shortening the duration of the low frequency envelope in your mix. Since the kick tends to be more transitory than the bass guitar, this gives you the idea that the low frequency content of your mix is inconsistent. For pop music, it’s best to have the kick provide the percussive nature of the bottom while the bass fills out the sustain and musical parts. 

    3. Make sure the snare is strong, otherwise the song will lose its drive when everything else is added in. This usually calls for at least some compression. You may need a boost at 1kHz for attack, 120 to 240Hz for fullness, and 10k for snap. As you bring in the other drums and cymbals, you might want to dip a little of 1k on these to make room for the snare. Also make sure that the toms aren't too boomy (if so, try rolling them off a bit below 60 Hz first before you begin to EQ elsewhere). 

    4. If you’re having trouble with the mix because it's sounding cloudy and muddy on the bottom end, turn the kick drum and bass off to determine what else might be in the way in the low end. You might not realize that there are some frequencies in the mix that aren't musically necessary. With piano or guitar, you're mainly looking for the mids and top end to cut through, while any low-end might be just getting in the way of the kick and bass, so it’s best to clear some of that out with a high-pass filter. When soloed the instrument might sound too thin, but with the rest of the mix the bass will sound so much better, and you won’t really be missing that low end from the other instruments. Now the mix will sound louder, clearer, and fuller. Be careful not to cut too much low end from the other instruments, as you might loose the warmth of the mix.

    5. For dance music, be aware of kick drum to bass melody dissonance. The bass line is very important and needs to work very well with the kick drum when it’s reproduced over the huge sound systems commonly found in today's clubs. If your kick has a center frequency of an A note at around 50 or 60Hz and the bass line is tuned to A#, they’re going to clash. Tune your kick samples to the bass lines (or vice versa) where needed.

    6. If you feel that you don't have enough bass or kick, boost the level, not the EQ. This is a mistake that everyone makes when they’re first getting their mixing chops together. Most bass drums and bass guitars have plenty of low end and don't need much more, so be sure that their level together and with the rest of the mix is correct before you go adding EQ. Even then, a little goes a long way."

    You might want to read some additional book excerpts at bobbyowsinski.com, or check out the Audio Mixing Bootcamp video series from Lynda.com.

    ----------------------------------

    You should follow me on Twitter for daily news and updates on production and the music business.

    Don't forget to check out my Music 3.0 blog for tips and tricks on navigating social media and the new music business.

    LinkWithin

    Related Posts Plugin for WordPress, Blogger...