Get This Free Cheat Sheet Guaranteed To Help Your Next Mix

Showing posts with label PreSonus StudioLive. Show all posts

Sunday, December 21, 2014

Bobby O's Top 5 Audio Products Of 2014

There are always a number of new audio products that stand out from crowd, at least for me, and I'd like to solute some of them in my first annual Top 5 Products list. I'm going to list the pieces in no particular order and tell you why I thought they were cool.

SSL XL-Desk - A new console featuring 500 series slots. How cool is that? Of course this concept was no big deal in the 60s and 70s when a number of console manufacturers operated using cartridge modules, but few modules were interchangeable between manufacturers then. Now they are, making the XL-Desk very flexible.


Sample Magic Magic AB plugin - Anyone thats mixing knows that it can be a pain to easily A/B you mix against another. Magic AB makes this easy, since it's a plugin that goes across your stereo buss and allows you to compare up to 9 different songs, as well as loop them at just the right points, and precisely match levels.

PreSonus StudioLive RM - The PreSonus StudioLive console provides a tremendous bang for the buck, but one of the cooler features is how it can be remotely controlled from a laptop or iPad. PreSonus takes this concept one step further with the StudioLIve RM by providing just the I/O and leaving the control to your laptop or a specially built touch sensitive surface. The fewer controls, the less you pay, and it's so cool to use something so futuristic as well.

UAD AMS RMX16 - You might say that the RMX16 was the sound of the 80s in that it was part of the drum sound on so many hit records, especially those coming out of England. Universal Audio released a plugin version of the reverb a few months ago (coded by the original designer of the RMX16) and it sounds so much like the hardware version that it's scary. Just dial in the Nonlinear or Ambience setting and you'll know what I mean.
Blue Mo-Fi Headphones - The world of monitor speakers changed for the better when powered monitors became the norm, and now the same thing may be on the horizon for headphones as well, thanks to the Blue Mo-Fi's. It has three selections - using the built-in amp in the headphones, bass boost, or bypassed so it works like a normal headset. This is another one under the category of, "Why didn't anyone think of this before."

Special Mention: Audionamix ADX Trax - This is the software that so many of us have wanted for so long. It allows you to precisely isolate a vocal from a finished stereo mix, then raise and lower the level as needed. I don't know how they do it, but it's very cool indeed.

These products really caught my attention this year, but there are lots of others that are worthy of inclusion as well. I'm sure you have your own top 5 and I'd love to hear them. What did I miss that was cool?

Tuesday, October 28, 2014

3 Steps To A Quick Onstage Monitor Mix

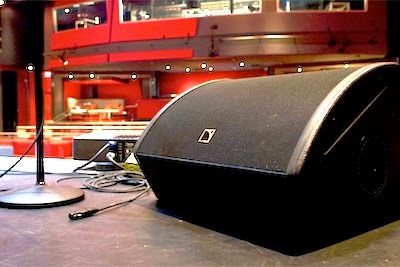
Stage Monitor image
It's time to mix a live show and you find you have the thankless job of mixing stage monitors from your front of house position. Don't pull your hair out. Use this quick method to get up and running while keeping the band happy in virtually no time at all.

This method assumes there's only one monitor mix instead of multiple mixes. Here's what to do:

1. Have everyone in the band raise their hand.

2. Tell them to lower their hand as soon they can hear themselves in the monitor.

3. Begin to increase the send of each instrument one by one. Continue to increase until the player lowers his hand. Proceed to the next instrument.

You might still have to tweak the mix a little afterwards, but you'll find that you'll have a workable monitor mix in just a couple of minutes.

You can find more tips like this, as well as a great overview on how to use the PreSonus StudioLive console, in my PreSonus StudioLive Handbook.

Read excerpts from this and my other books on the excerpts section of bobbyowsinski.com.
----------------------------------

Tuesday, July 1, 2014

2 Tricks For Taming A Reflective Room

2 tricks for taming a reflective room like a gym
Live sound engineers all say that the venue they hate to work in the most is one with a lot of reflections. It's their worst nightmare, and you can hear both Dave Weckl engineer Dennis Moody and Blue Oyster Cult FOH man Steve La Cerra talk about it on my Inner Circle Podcast (Steve's coming up in a few weeks). It doesn't matter how big or small the venue is, if there's a lot of reflections, you going to have some problems.

Here are a couple of tricks from my PreSonus StudioLive Mixer Official Handbook that engineers have been using successfully to combat serious reflective problems and bring the vocals out from behind the natural room reverberation.

1. Increase 2.9k or 3.5kHz by a couple of dB on either the High-Mid or High frequency equalizer of the vocal channel. Generally speaking, raising 1kHz on a vocal gives it more energy in any mix, but in a live situation in a reverberant environment, moving the frequency up can help it cut through the mud. You could even try this on the FOH EQ to see if it helps the entire mix.

2. Cut some of the low frequencies of the kick, bass and floor tom by a couple of dB at anywhere from 60Hz to around 130Hz, depending upon the venue. Cutting lower than that will make it seem like all of the low end has disappeared. In most reflective venues, the majority of the problem lies in too much low end bouncing around the room. Lowering the level of the subs, or lowering these frequencies on the FOH EQ can also make a difference, but you want to be careful that the power doesn't leave the mix, so be judicious.

Remember that a little EQ can sometimes go a long way, so boost or cut in small increments.

To read excerpts from the PreSonus StudioLive Mixer Official Handbook and my other books, go to the excerpts page of bobbyowsinski.com.
----------------------------------

Monday, May 26, 2014

Farewell Bob Tudor

Bob Tudor answering a question at PreSonusphere
Over the weekend came the sad news that PreSonus CTO Bob Tudor passed away after a long battle with cancer, and the audio manufacturing community mourns.

Many of you aren't aware of Bob and you should be, because he's so influential in digital console and recorder design and development, having a major hand in the Mackie and PreSonus StudioLive consoles as well as the Tascam US-2400 control surface and X-48 hard-disk recorder and various digital products for QSC, Samson, MAudio, Shure, Alesis, Gibson, Fender and more. His products garnered 5 TEC awards, 5 MIPA awards, as well as many others.

Bob wasn't just an electronics boffin though, he was an accomplished recording engineer and keyboard player as well, working with everyone from Peter Wolf/J. Geils Band to Extreme to Aimee Mann to Billy Idol, among others.

What I remember most about Bob was a conversation we had about a year ago when I was at the factory getting some background information while I was writing the PreSonus StudioLive Handbook.

"Cancer was the best thing that ever happened to me," he said during a private moment in his office. I looked at him rather incredulous that something so terrible could be looked at in that light, but he went on to explain, "It caused me to look at my life in a different way and to see what actually is important, and what isn't." Bob continued, "If it wasn't for cancer, I wouldn't have met the love of my life, and whatever time I've had with her makes it completely worth it."

He was totally at peace with himself and his lot in life. Not many of us can say the same.

So long, Bob. Thanks for the great products. We're gonna to miss you.
----------------------------------

Wednesday, April 30, 2014

2 Recording Myths Busted

Safe Digital Recording image
When digital recording first came on the scene, many engineers had a difficult time making the switch from analog because the philosophy on how to record the cleanest sound had changed. The meters were different, for one thing, so setting the correct recording level was sometimes a question. Later when digital recording became more sophisticated and refined, the philosophy on how to get the the best sound changed yet again. Here's an excerpt from my PreSonus StudioLive Mixer Handbook that busts a couple of myths about digital recording levels as well as give a short history of how they came to be.

"Over the years, some misconceptions about meter level readings have arisen which have left many confused on just what the correct level should be, so let’s bust a couple of myths.

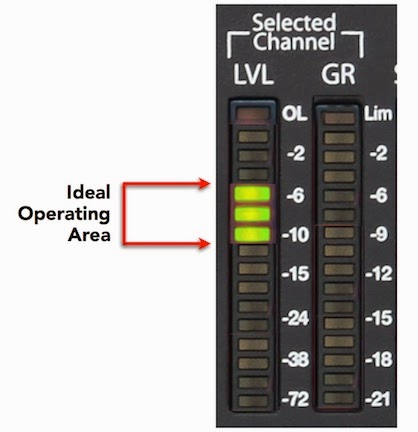
Myth #1: You have to record at close to 0 dB FS for it to sound good. For the most part, you do not have to record with the level close to 0 dB (the highest it will go before the red overload indicator lights) on today’s digital gear. If your signal peaks are between -6 and -10 dB or even lower on the channel meter, it will sound fine (see the graphic on the left). In the early days of digital recording, a meter reading close to 0 dB actually was necessary in order to keep the noise to a minimum because of the 8 and 16 bit resolution that was being used, but modern 24 bit recording no longer has this limitation. 

Myth #2: If I record at a lower level, the signal will be noisy. Again, this is untrue. You can easily record digitally at a lower level without directly introducing any noise into the recorded signal by the recording process. This myth actually comes from the analog tape days, where the magnetic tape medium itself had a level of self-noise in it. If you recorded too low, you’d begin to hear the tape noise, but that doesn’t happen in the digital world.

Now what can happen is that if everything you record is at -30 dB, you’ll have to increase the gain somewhere later when you’re mixing, and that may introduce some noise and you won’t be taking advantage of the digital medium’s dynamic range. Because StudioLive is a digital mixer, you can actually almost get away with doing this, which isn’t possible in the analog world. Still, if you keep the levels in the -10 to -6 dB range, you’ll have the best of all worlds, with lots of level, dynamic range and headroom."

Don't forget that the above applies to recording levels only. It's most likely that these levels will need to be boosted in the mix or at mastering, although it's always a good idea to be conservative with your levels (let the mastering engineer do the boosting). Also, take a look at this post regarding the new loudness measurement standards.

----------------------------------

Tuesday, March 18, 2014

The Secret To Suppressing Feedback

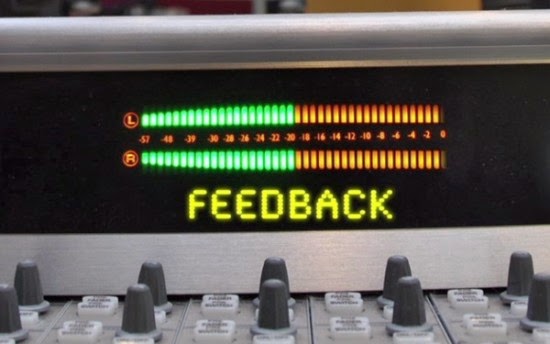
Feedback Meter image
If you're a gigging band and not playing venues where the sound is taken care of by a sound company, most likely you're running into feedback problems on a nightly basis. Here's an excerpt from the Presonus StudioLive Official Handbook that outlines the procedure for suppressing feeding the old fashioned way - with your ears.

"When it comes to suppressing feedback (you can never completely eliminate it), there are two methods; the classic method that’s been used for many years called “ringing out the system,” and a much faster an easier way using Smaart. Let’s look at the classic method first.

Ringing Out The System
Ringing out the system works on both the main house system and the monitor system. Here’s how it works:
1. Make sure that all the mics are on, are set at the levels they’ll most likely be at during the show, and in their normal stage positions. You should also have a mix set up with the approximate balances that you’ll eventually be using. 
2. Make sure that all the hi-pass filters on the individual channels are engaged as needed. This will eliminate any low frequencies that the ear can’t hear but will be amplified nonetheless (you don’t want to amplify the rumble of trucks on the street, for example).   
3. Slowly increase the overall gain of the sound system until you can just barely hear feedback. As it feeds back, lower the slider of the aux’s graphic EQ at the frequency that the feedback is occurring until the feedback stops.
TIP: Instead of using only one frequency band, you might want to set the GEQ to Draw Mode (see later in the chapter) in order to use two or three centered around the feedback frequency at a shallower level. This will eliminate the feedback without as much change to the tonality of the system.
4. Slowly increase the gain of the sound system again until feedback occurs once more. This time it will probably be at a different frequency. As it feeds back, lower the slider (or sliders) of the graphic EQ at the frequency that the feedback is occurring until it stops.
5. Repeat the process (you might have to repeat four or five times) until you finally hear multiple frequencies feeding back at the same time. At this point, you’ve now reached the maximum headroom in the system before feedback. Back the gain down a bit until the feedback stops and begin your soundcheck, rehearsal or show.  
One of the problems with this method is that you actually have to find the frequency on the graphic EQ that controls the feedback you’re hearing. This usually takes a little ear training to develop a feel for how the frequencies you’re hearing correspond to the frequency EQ sliders.


Another problem is that after you used Smaart to tune the system to the room, you might be destroying that tuning by pushing the system louder and then trying to eliminate the feedback. Modern sound systems are capable of being pretty loud and usually don’t have to be tweaked to within an inch of their lives to get more gain before feedback."

One of the cool features of the Presonus StudioLive console is that if you connect a computer to it, you can access the Smaart measurement tools (Smaart stands for Sound Measurement Acoustical Analysis Real Time) that provide a streamlined way of tuning your sound system to the room, find feedback, troubleshoot outputs, and automatically compensate for delay speakers. It's a very powerful and easy to use package that makes what used to be a time-consuming chore a breeze.

----------------------------------

You should follow me on Twitter and Facebook for daily news and updates on production and the music business.

Don't forget to check out my Music 3.0 blog for tips and tricks on navigating social media and the new music business.

Tuesday, March 11, 2014

Troubleshooting Your Sound System When Things Go Bad

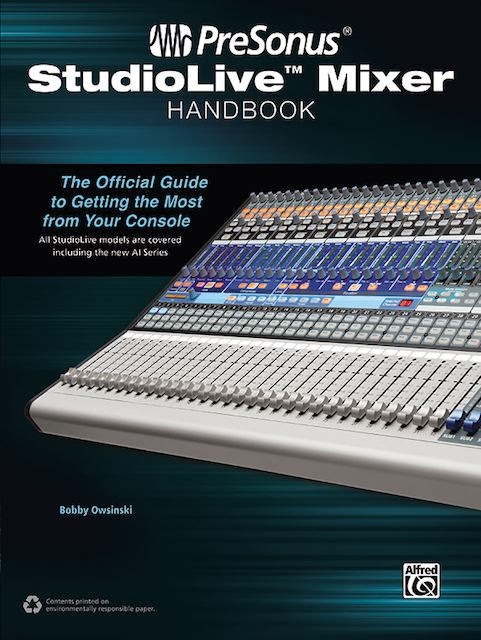
PreSonus StudioLive Mixer Handbook cover image
Whether you're in a live situation or in the studio, things can suddenly sound distorted, or there could be no sound output at all. You can spend a lot of time chasing your tail trying to find out what's wrong unless you have an orderly procedure to follow that allows you to troubleshoot the system quickly so you can get back making music in short order.

Here's an excerpt from my new PreSonus StudioLive Mixer Handbook that was recently released. StudioLive is one remarkable console in that it packs a tremendous bang for the buck - so much so that many owners never use it to its full advantage. That's why I wrote the book, to hip everyone to the wonderful features that are under the hood and come to life when you connect a computer or iOS device. What do I mean? How about:

  • Remote control of the console through an iPad
  • Being able to change individual monitor or cue mixes from an iPhone
  • Room tuning and feedback suppression via the built-in Smaart analysis tools

And that's not even talking about all the excellent attributes of a fine digital console that's one of the easiest to use in the business. That being said, here's the excerpt about troubleshooting your system from the book.

"If something doesn’t appear to be working or if the sound is noisy or distorted, here are a couple of checklists to help you get to the bottom of the problem.

If There’s No Audio:
  • Is the mic plugged into the correct channel? Select the Input meter button to see if the mic is registering on another channel meter. Repatch it to the correct channel if it is.
  • Is the Mute switch on the channel engaged?
  • Is the Firewire or Digital [recorder] input button selected?
  • Is the Mic/Line control raised high enough? Raise its level more.
  • Is the master fader at zero?
  • Is there an outboard device connected to the insert of the channel? Disconnect it to see if the sound returns. If it does, the fault lies with the outboard device or its cables.
  • Is there sound getting to the output? If you have meter deflection but no sound, the problem could be the amps or speakers. If you’re computer is connected to StudioLive and you’re running VSL, open up Smaart and use to the Output Check as described in Chapter 12.
  • Try another mic cable.
  • Try another microphone.
If The Audio Is Distorted:

  • Are other mics distorted too? If so, check to see if the amplifiers for the sound system are overloading. Also, check to seen if a speaker is blown.
  • Is the Mic/Line control set too high?
  • Is distortion occurring somewhere else in the console? 
  • Are any overload lights on anywhere in the system?
  • Try another mic cable.
  • Try another microphone."
Follow the above proceedures and you should find your problem with a minimum of time spent.

To read additional excerpts from the PreSonus StudioLive Handbook: The Official Guide and my other books, go to the excerpts section of bobbyowsinski.com.

----------------------------------

You should follow me on Twitter and Facebook for daily news and updates on production and the music business.

Don't forget to check out my Music 3.0 blog for tips and tricks on navigating social media and the new music business.

LinkWithin

Related Posts Plugin for WordPress, Blogger...